It is thrilling to get your Shopify shop going, but the important thing that will transform your shop online into a branded, grown-up enterprise is getting your domain pointed. When you have created an account on Shopify and bought your domain, connecting it to your store will not only make it visible in your shop but also make your customers find you without any confusion.
In this blog post, we shall take the visitor through the steps of getting a Shopify domain either through automatic or manual means. We are also going to discuss such technical terms as Shopify IP address, Shopify nameservers, and Shopify hosting.
Alright, then, let us cut to the chase!
The Importance of Connecting a Domain
Your online identity is your name on the Web. When you use a custom domain to link with your Shopify store, you develop credibility, enhance branding, and establish a well-organized customer experience.
Though Shopify allows you to use a domain like yourstore.myshopify.com, it will be more professional to use your domain (e.g., billing.websouls.com), which can also increase your ranking in search engines.
Method 1: Set up Your Domain with Shopify Automatically
You can easily connect your domains with Shopify through some of the providers, and this kind of service will be fast and without any inconveniences.
Domain Auto Connect Steps:
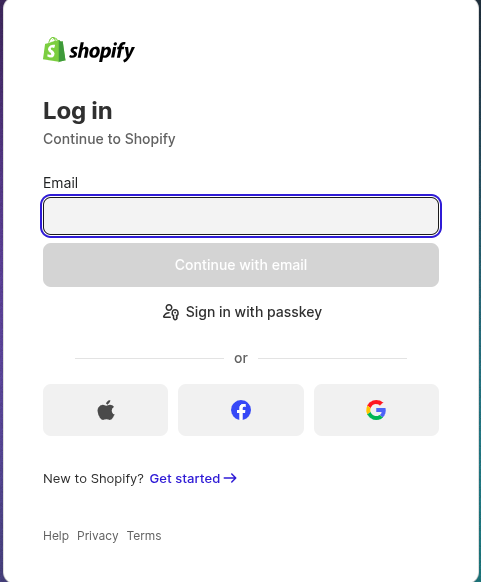
- Get into your Shopify account.
- Go to settings > Domains.
- Select the option Connect existing domain.
- Click on the Next button after entering the domain that is yours.
- In case your domain registration enables automatic connection, you will find a log-in prompt.
- Enter your domain registrar when prompted.
- Enable Shopify to connect the domain in your place.
- Shopify will automatically change all the DNS settings (Records and IP address of Shopify).
- A couple of minutes later, the domain status must be “Connected.”
With Shopify, the tough work is done, like dealing with DNS options and so you do not need to be involved manually in what records and nameservers to deal with.
Method 2: Manual Way to Connect a Domain
Not all domains may be served with automatic connection, and in that case, there is no need to panic. It is also easy to connect manually with some help.
The procedures for connecting a domain manually:
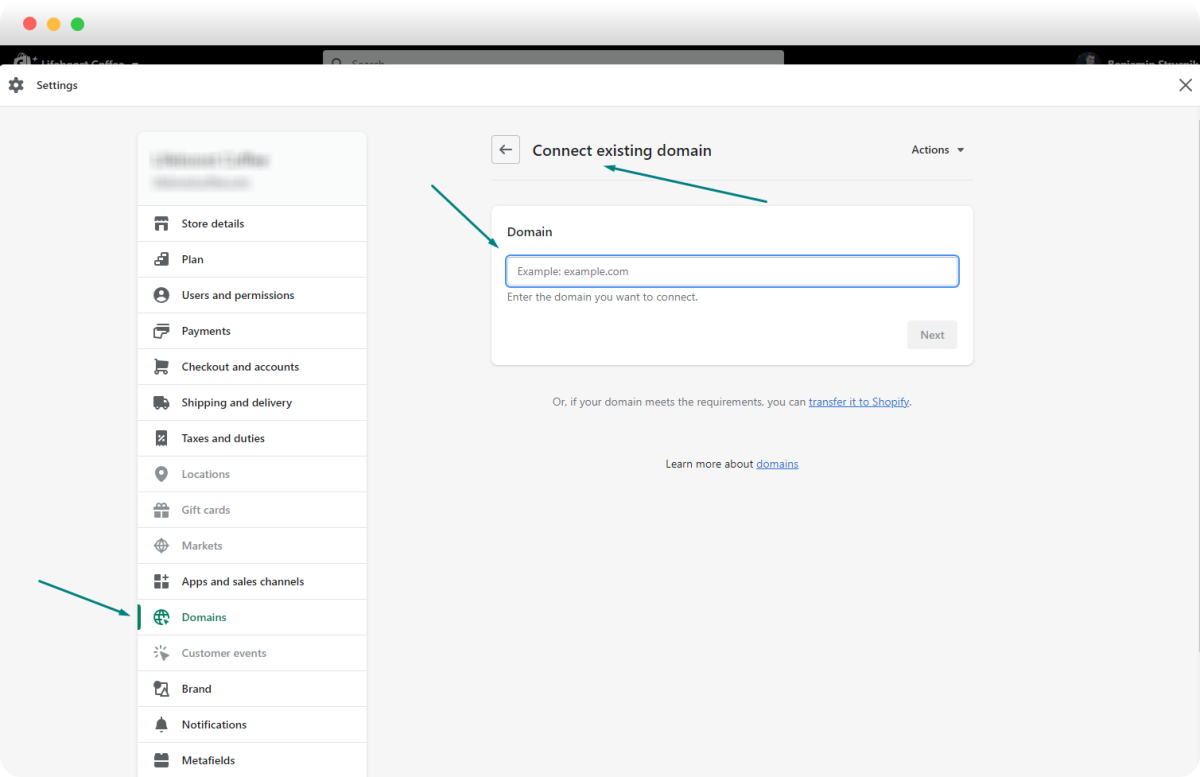
Access your Shopify storehouse.
- Click on Settings > Domains.
- Click on Connect existing domain.
- Type in your domain name and then click Next.
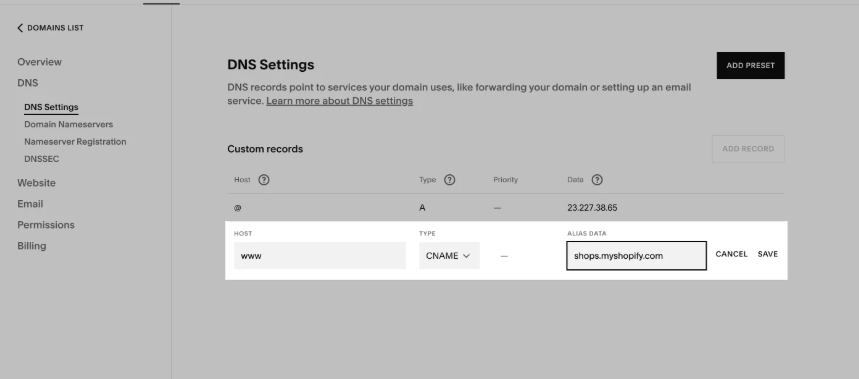
Change DNS record on your domain registrar:
- Log in to your Domain registrar account (e.g. Websouls, Namecheap).
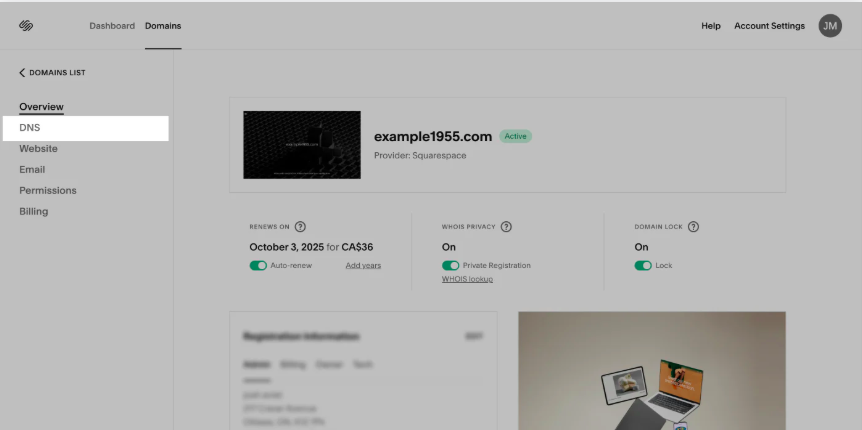
- Identify DNS settings or DNS Management of your domain.
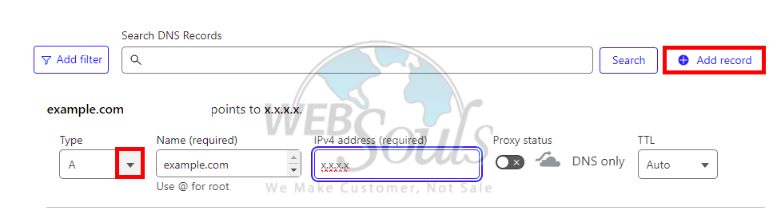
- Aim A Record at Shopify:
- Change your A record to that of Shopify: 23.227.38.65.
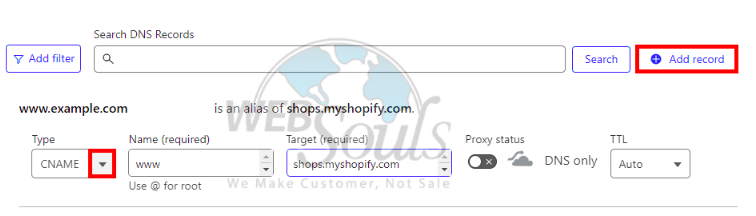
CNAME Www to Shops.Myshopify.Com
Erase Any AAAA Records
Connection In Shopify
- Go Over to Shopify and Go to Settings, Connections.
- Click Connect Existing Domain
- In The Box, Enter the Domain Name
- Click Connect Domain
This update via change in DNS may take as long as 48 hours to reach the entire world. After connecting, set up your email address!
Besides the automatic and manual connection processes, there also exist a few additional ways in which your domain can be connected to your Shopify store, depending on the manner and the location in which you bought your domain.
Method 3: Shopify Transfer Domain
If you would like to work on all the things in one place, you can switch your domain right away to Shopify. This allows you every control over your territory within the Shopify dashboard.
How to Migrate Domains to Shopify:
- Ensure that your domain has been registered for over 60 days.
- Open the domain in the registry to which you have registered it.
- Get the authorization code (EPP code).
- At the Shopify admin, go to Settings > Domains > Transfer domain.
- Type in the domain name and code of authorization and begin the process.
- Pay any transfer fees due (and a 1-year renewal).
After doing this, the service will set DNS automatically, and Shopify will host your domain name.
Method 4: Using a Subdomain
Do you already use your main domain as a site or blog?
It is possible to host your Shopify store via a subdomain (e.g. shop.yourwebsite.com).
How to do it:
- Make a subdomain in the DNS settings of your domain registration.
- Redirect the CNAME record to the subdomain to be shops.myshopify.com.
- In Shopify, open Settings > Domains, and choose Connect existing domain, and write your subdomain.
- Also, check and configure.
It is ideal in case a company intends to have a separate store, not located at its main location.
Overview of all Methods of Domain Connections:
| Method | Best For | Difficulty | Key Requirement |
|---|---|---|---|
| Automatic Connection | Domains from supported registrars | Very Easy | Log in to the domain provider |
| Manual Connection | Any domain provider | Moderate | Access to DNS settings |
| Domain Transfer to Shopify | Centralized management | Easy | Authorization code, domain eligibility |
| Using a Subdomain | Add Shopify to existing site | Moderate | Domain DNS access |
Connecting Your Domain to Shopify Using Cloudflare
In case you have Cloudflare as the resource that allows you to manage your domain, you will be able to obtain additional security and enhanced control of the DNS as you bind your domain to Shopify. In this section, we will go through the entire process- opening a Cloudflare account and setting DNS records appropriately.
Use the following guidelines to make the communication between your Shopify and the domain simple.
- Sign up on Cloudflare and add your Domain
- Configure Shopify with Point Your Domain through Cloudflare
Open Cloudflare and Add Your Domain
In order to deal with DNS better and protect your domain prior to connecting it to Shopify, first of all, you have to configure Cloudflare:
- Create an account on Cloudflare: Go to the signup page of Cloudflare, enter your email and the password of your choice, then press Create Account
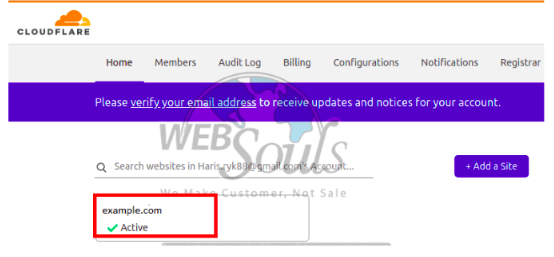
- Once you have logged in, go to the Add site.
- Type your root domain (e.g. example.com) and press Add Site.
- Cloudflare will perform checks on the DNS records currently in existence (this typically takes ~60 seconds).
- Select a plan, you can use a free one when it comes to Shopify stores, and confirm.
- Check the DNS table, you should make sure that Cloudflare picked up your existing records. Add manually those ones that are missing.
- Modify nameservers. Cloudflare will be equipped with two nameservers. Log in using your domain registrar and update your existing nameservers with Cloudflare nameservers
- Wait to activate. Updates to nameservers can take as long as 24 hours to resolve.
Using Cloudflare to Point Your Domain to Shopify
After you have managed your DNS through Cloudflare, the following steps will help you link your Cloudflare and Shopify:
- Go to the Cloudflare Dashboard and choose your domain
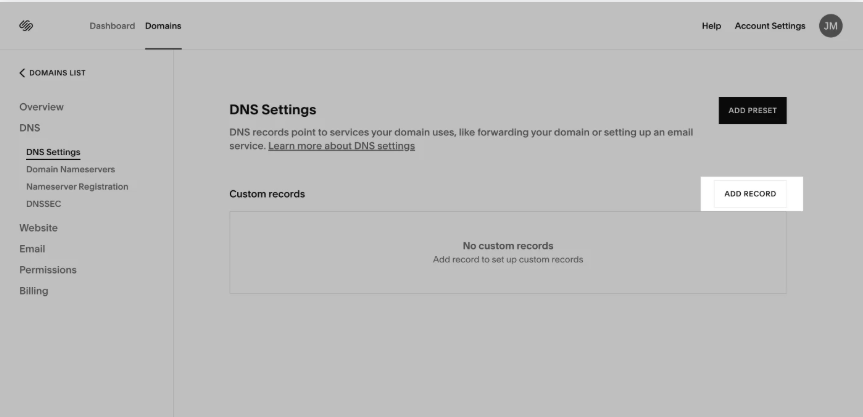
- Go to the DNS tab.
- Remove duplicate CNAME records which are irrelevant to Shopify.
- Hit on Add record (must add accurate details)
- Add a CNAME record, target it to shops.myshopify.com.
- Proxy status must be DNS ONLY.
- Keep the records and confirm your domain in Shopify.
What are Shopify DNS Settings?
Some terms you will find when hooking up a domain are IP addresses, nameservers, as well as DNS records. These we can decompose:
The IP of Shopify
That is the address to which your domain should redirect its A record. All the stores are hosted in a shared IP (23.227.38.65) at Shopify. This will enable your domain to connect to the Shopify hosting without a specific server.
Shopify Nameservers

In case you are using Shopify as your domain supplier, the nameservers are preconfigured for you. But in case of a third-party domain, you do not usually need to update nameservers; you will only require updating the A and CNAME records.
Shopify Hosting
When you are connected to your domain, Shopify will host your website materials, monitor the speed of the site, and provide uptime. It does not require an additional purchase of a web hosting service.
How to Get a Domain in Shopify?
As a user, to identify and buy an available Shopify domain, you can utilize the Shopify domain search tool. Nevertheless, a significant number of users choose to acquire the product through third-party providers such as Websouls by paying more lenient prices, receiving additional services, and being served locally.
Even when you have already purchased a domain at another provider, you can connect the domain to Shopify without any challenges by looking at any of the ways above.
Final Thoughts
One of the important steps to establish your eCommerce presence is to connect your domain with Shopify. The connectivity, whether automatic, manual, or any other way, can be done with some patience and attention to detail.
In case you have to find a trustworthy and reliable place to buy a domain or want to have cheap solutions on hosting sites and services in order to start your business, we suggest using Websouls.
Websouls offers professional assistance and affordable packages, which make the service of taking care of your domain and web hosting very effortless and effective.

.png&w=1920&q=75)
.png&w=1920&q=75)