Key Takeaways
cPanel is a Linux-based control panel that lets you manage your entire hosting account from a browser; no technical background needed.
You can set up emails, install WordPress, manage domains, create databases, install SSL certificates, and back up your website, all from one dashboard.
File Manager and FileZilla (FTP) let you upload, edit, and organize your website files without touching a single line of command.
The Domain Name System (DNS) settings inside cPanel control where your domain points and how your emails are routed.
Backing up your website through cPanel is something you should be doing regularly; it takes minutes and can save you from hours of headaches.
Hosting with an official cPanel partner means better support, licensed software, and access to the full feature set without limitations.
So you just got hosting, and someone handed you a link ending in /cpanel. You stare at it. There are icons everywhere. It looks like the dashboard of a small aircraft. You close the tab and Google "how to use cPanel," and here you are. Welcome.
Here's the thing: cPanel is actually one of the most beginner-friendly tools in web hosting, once someone walks you through it. It runs a massive chunk of the internet. Our data tracks over 168,000 companies using cPanel, ranging from small freelance agencies to brands you would recognize instantly. PHP still powers over 72% of the internet, and cPanel is one of the most common environments where PHP-based websites, including WordPress, are hosted and managed.
cPanel, developed and maintained by cPanel, L.L.C., has been around since 1997 and has grown into the go-to interface for shared hosting management worldwide. cPanel provides one of the internet infrastructure industry's most reliable and intuitive web hosting automation platforms, giving customers the ability to manage every aspect of their website through simple point-and-click software.
In this guide, we will discuss everything from logging in for the first time to installing WordPress, setting up emails, managing DNS, installing an SSL certificate, and backing up your site. Whether you just launched your first website or you are managing a few client sites, this will help you move faster and stress less.
What is cPanel?

cPanel is a web-based control panel used to manage hosting accounts. It works inside your browser, so you do not need coding knowledge to use most features.
You can use cPanel to:
Upload website files
Create professional email accounts
Install WordPress
Manage backups
Create databases
Install SSL certificates
Manage domains and subdomains
Monitor storage and bandwidth
Manage DNS settings
Most hosting providers give cPanel access with shared hosting, VPS hosting, and dedicated servers.
Getting into cPanel - Your First Login
Before anything else, you need to actually get inside cPanel. Your hosting provider sends you login details when you sign up. The login URL is usually one of these formats:
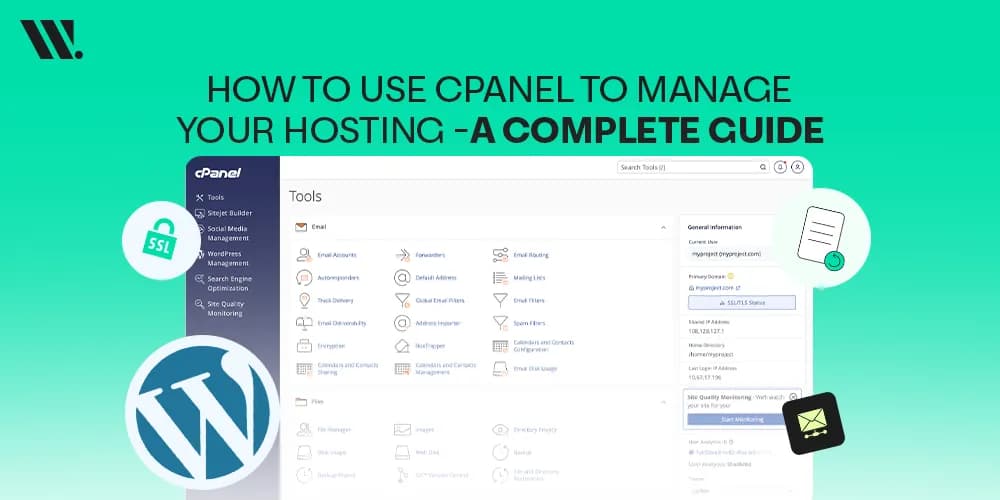
After receiving your cPanel login credentials from your hosting provider, you access the control panel through a web browser. Upon logging in, you will be greeted with the cPanel interface, which is divided into sections including Files, Databases, Email, Domains, Security, Software, and Advanced. Each section contains tools and settings for managing different aspects of your hosting account.
One tip worth mentioning early: use the search bar at the top of the dashboard. If you are looking for something specific, like "SSL" or "Email," just type it and cPanel will filter the relevant tools. This saves a lot of scrolling, especially when you are new.

Understanding the cPanel Dashboard
Consider the cPanel dashboard as a control room. Everything is sorted into labelled sections. You do not need to know every tool on day one, but it helps to know what lives where.
The layout is divided into sections: Files, Databases, Email, Domains, Security, Software, and Advanced, each with icons and labels for the tools inside. Here is a quick overview of the sections you will visit most often:
Section | What It Does |
Files | Manage your website files: upload, edit, delete, and organize |
Create email accounts, set up forwarders, and manage spam filters | |
Domains | Add add-on domains, subdomains, and redirects |
Databases | Create and manage MySQL databases and users |
Security | Install SSL certificates, manage SSH keys, and IP blocking |
Software | Access Softaculous to install WordPress and other apps |
Backups | Download and restore full account or partial backups |
Advanced | Cron jobs, error pages, and terminal access |
One useful feature many people overlook is the ability to customize the dashboard layout. You can pin frequently used tools, collapse sections you rarely touch, and search for features instantly using the search bar at the top. This makes daily website management in cPanel much faster once you start working on multiple sites.
Getting comfortable with this layout takes one or two sessions. After that, it becomes second nature.
File Manager - Managing Your Website Files
The File Manager in cPanel is your online file browser, like Windows Explorer or Mac Finder, but for your server. You can upload, rename, move, delete, edit, and even unzip files directly from your browser, no FTP software needed for basic tasks.
Your main website files live in the public_html folder. This is where your homepage, images, CSS files, and everything visible on your site are stored. If you are running WordPress, this folder holds your entire WordPress installation.
Here is what you can do directly from the File Manager:
Upload files by clicking the Upload button and selecting files from your computer
Edit files like .htaccess or wp-config.php directly in the browser editor
Create new folders for organizing your files
Extract the ZIP files you have uploaded, useful for themes or plugins
Set file permissions (chmod) for files that need specific access settings
One thing to be careful about: always keep a backup before editing any file directly. If you accidentally break something in a PHP file, you will want to undo it quickly. The File Manager does not have an undo button.

Uploading Files with FileZilla (FTP)
For larger uploads or when you prefer a faster workflow, FileZilla is the tool to use. FileZilla is a free, open-source FTP client available for Windows, Mac, and Linux. You can download it from the FileZilla Project. It connects to your server and lets you drag and drop files between your computer and your hosting account.
FileZilla is an open-source FTP client available on multiple platforms, including Linux and Windows. It also supports FTP over secure connections, SFTP, and FTPS.
To connect FileZilla to your cPanel hosting:
Open FileZilla and go to File → Site Manager → New Site
Enter your Host (your domain or server IP)
Enter your cPanel username and password
Set the Port to 21 for FTP, or 22 for SFTP (recommended for security)
Set Logon Type to Normal and click Connect
Once connected, the right side of FileZilla shows your server files, and the left side shows your local computer files. Drag files from left to right to upload, or right to left to download. Your website files are in the public_html directory. I strongly recommend using SFTP over simple FTP; it encrypts the connection and keeps your credentials safe in transit.

Setting Up Email Accounts in cPanel
This is one of the most used features for business owners. Having a professional email like hello@yourdomain.com looks far better than a Gmail address on a business card. cPanel makes setting this up very simple.
To create an email account, go to Email → Email Accounts in your dashboard. Click Create and fill in the details:
Username - the part before the @
Domain - select your domain from the dropdown
Password - use a strong one, and store it somewhere safe
Storage - set a mailbox size limit (or leave it unlimited, depending on your plan)
Once created, you can access your emails in two ways. The first is through webmail; cPanel provides built-in webmail clients like Roundcube, which you access at yourdomain.com/webmail. The second is by connecting your email to an external client like Outlook, Apple Mail, or Gmail using IMAP or POP3 settings; cPanel gives you these settings automatically inside the Email Accounts section.

A few other email tools worth knowing about:
Email Forwarders - automatically forward emails from one address to another
Spam Filters - powered by SpamAssassin, help cut down on inbox noise
Email Routing - controls how emails are handled, important if you use an external email service like Google Workspace

Domain Management in cPanel
Managing domains in cPanel covers a lot of ground. You can add new domains, create subdomains, set up redirects, and control your DNS, all from the Domains section.
Addon Domains
An addon domain allows you to host a completely separate website on your hosting account using its own domain name. Unlike subdomains, which are extensions of your main site (e.g., blog.example.com), these domains use entirely different domains (e.g., example2.com).
To add an addon domain, go to Domains → Create a New Domain, type the full domain name, and set the document root (the folder where that domain's files will be stored). cPanel automatically suggests a folder, and most of the time you can leave it as-is.
Something to keep in mind: if your domain is not pointed to your nameservers, you will need to update the DNS settings with your domain provider before the addon domain will work.

Subdomains in cPanel
Subdomains are great for separating sections of a site, like shop.yourdomain.com for an online store, or blog.yourdomain.com for your blog section. In the Domain text box, you type the name of the subdomain you want to add, clear the "Share document root" checkbox, and set the document root to its own dedicated directory outside of public_html for better security isolation.

Managing DNS in cPanel
The Domain Name System (DNS) is what connects your domain name to your server's IP address. Inside cPanel, the Zone Editor is where you manage DNS records for your domain. Here are the record types you will encounter most:
Record Type | What It Does |
A Record | Points your domain to an IP address |
CNAME | Points a subdomain to another domain name |
MX Record | Controls where emails for your domain go |
TXT Record | Used for domain verification, SPF, and DKIM |

If you switch to a new server or set up an external email service like Google Workspace, you will need to update your DNS records here. Changes to DNS can take anywhere from a few minutes to 48 hours to fully propagate across the internet, so plan accordingly.
Installing WordPress with Softaculous

This is where cPanel gets really powerful for website owners. Installing WordPress manually means downloading files, uploading them via FTP, creating a database, and editing config files; it is a whole process. With Softaculous, it takes under five minutes.
Softaculous is an auto-installer that ships with virtually every cPanel hosting plan. It maintains a library of over 400 web applications and handles the entire installation workflow, creating the database, configuring file permissions, writing the wp-config.php file, and running the WordPress setup routine.
To install WordPress through Softaculous:
In cPanel, scroll to the Software section and click Softaculous Apps Installer
Find WordPress, it is usually on the front page, and click Install Now
Fill in the installation form:
Choose Protocol - select https:// if you have an SSL certificate
Choose Domain - pick the domain or addon domain you want WordPress on
In Directory - leave this blank for the main site, or type a folder name for a subdirectory install
Site Name and Description - your website's title and tagline
Admin Username and Password - do not use "admin" as the username
Admin Email - this is used for password resets and update notifications
Scroll down and click Install
That is it. Softaculous creates the database, uploads the files, and gives you a link to your new WordPress site. The whole thing takes about two minutes.
Softaculous also supports staging environments on many hosting plans. A staging site lets you test plugin updates, design changes, or new features before applying them to your live website. This is especially helpful for business websites and online stores where downtime can affect visitors or sales.
I also recommend enabling automated backups in Softaculous during this step. There is an option for it in the Advanced section of the installer; set it to weekly at a minimum.
Database Management in cPanel
Every WordPress site, online store, or dynamic website runs on a database. In cPanel, databases are managed through the MySQL Databases tool and phpMyAdmin.
MySQL Databases are where you:
Create new databases
Create database users and assign passwords
Grant user permissions to specific databases
Delete databases you no longer need
phpMyAdmin is the visual interface for working inside the database itself. phpMyAdmin provides a graphical interface for managing your databases, allowing you to create tables, import data, and run queries. You will need your database username and password to log in.
For most WordPress users, you will rarely need to go into phpMyAdmin. The two most common reasons are importing a database backup during a site migration or manually updating something like a URL or admin password when WordPress itself is not accessible.
One naming convention to be aware of: databases begin with the cPanel username, and there is no way to change it. For example, if your cPanel username is "mysite", your database will be named something like "mysite_dbname". This is normal and expected.


SSL Installation in cPanel
An SSL certificate (Secure Sockets Layer) is what puts the padlock in your browser's address bar and switches your site from HTTP to HTTPS. It encrypts the connection between your server and your visitors. In 2026, this is not optional; browsers flag non-HTTPS sites as "Not Secure," and search engines factor HTTPS into rankings.
Most cPanel hosting plans include AutoSSL, which automatically installs and renews a free SSL certificate for your domains. To check if AutoSSL is active, go to Security → SSL/TLS Status in cPanel. If your domain shows a green padlock icon, you are already covered.
If you need to install a certificate manually, for example, a paid SSL from a certificate authority, the steps are:
Log in to your cPanel account, go to the Security section, and open the SSL/TLS Manager menu. Under "Install and Manage SSL for your site (HTTPS)," click on "Manage SSL sites." From there:
Select your domain from the dropdown
Paste your Certificate (CRT) file contents into the certificate field
Paste your Private Key into the key field
Paste the CA Bundle (intermediate certificate) into the third field
Click Install Certificate
After installing, you need to redirect visitors to the secure version of your site by setting up an HTTPS redirect. For WordPress sites, this is usually done by adding a redirect rule in your .htaccess file or through a plugin.


Backing Up Your Website in cPanel
If you are not backing up your site, you are one bad plugin update, one hack, or one accidental deletion away from losing everything. cPanel has a built-in backup tool that makes this very manageable.
Go to Files → Backup or Files → Backup Wizard in your dashboard. The Backup Wizard is easier for beginners; it walks you through the process step by step.
You can download:
Full Account Backup - everything: files, databases, emails, and settings in one compressed file
Home Directory Backup - just your website files
MySQL Database Backup - just your database(s)
Email Forwarder and Filter Backup - just your email configurations
To generate a full backup, you determine the destination Home Directory, Remote FTP server, or Secure Copy (SCP), enter an email address for a completion notification, and click Generate Backup. When the backup completes, a download link appears.


Restoring a Backup
To restore a full backup in cPanel, upload your backup file to the home directory using File Manager or FTP. Full account restores may require your hosting provider's assistance. You can manually restore specific components and files through File Manager and databases through phpMyAdmin.
My recommendation: download a full backup at least once a month, and before any major update to your website. Store it somewhere off your server, an external drive, Dropbox, or Google Drive. Hosting providers may keep server-level backups, but those are not a substitute for your own copies.
Security Features Inside cPanel
A lot of beginners only focus on uploading files and installing WordPress, but security matters just as much. One weak password or outdated plugin can create problems very quickly. cPanel includes several built-in security tools that help protect your hosting account and website.
Inside the Security section of your dashboard, you will usually find:
IP Blocker - blocks unwanted visitors or suspicious IP addresses from accessing your website
Hotlink Protection - stops other websites from directly using your images and files
Directory Privacy - password-protects folders on your website
SSH Access - secure command-line access for advanced users
Two-Factor Authentication (2FA) - adds an extra login security layer to your cPanel account
SSL/TLS Manager - manages certificates and encrypted connections
One thing I strongly recommend is enabling Two-Factor Authentication if your host supports it. Even a strong password becomes much safer when paired with 2FA.
You should also regularly check for outdated WordPress plugins and themes. Most hacked WordPress websites are compromised through old software rather than the server itself.

Cron Jobs in cPanel
At some point, you may hear someone mention "Cron Jobs" and wonder if it is something complicated. It sounds technical, but the idea is actually simple.
A cron job is an automated task that runs on a schedule, like setting an alarm for your server to perform actions automatically.
Inside cPanel, the Cron Jobs tool lets you schedule tasks such as:
Running WordPress scheduled tasks
Clearing cache files
Sending automated reports
Running backup scripts
Syncing data between applications
For beginners, you usually do not need to touch cron jobs immediately. But if your website grows or you start using advanced WordPress plugins, you may eventually use them.
One important thing: incorrect cron commands can create server load issues, so avoid copying random commands from forums without understanding what they do.


Resource Usage and Website Statistics
One underrated part of cPanel hosting management is monitoring your account usage. Many beginners ignore this until their website becomes slow or starts showing hosting limit warnings.
The Metrics section in cPanel helps track:
Bandwidth usage
CPU usage
Memory usage
Visitor statistics
Error logs
Disk storage
If your website suddenly slows down, checking resource usage can help identify the issue quickly.

For example:
High CPU usage may come from heavy plugins
Storage limits may be caused by old backups
Traffic spikes could indicate a successful campaign or suspicious bot traffic
The Errors tool is also useful because it logs website errors generated by your server. If a page suddenly breaks, this section often gives clues about what happened.
LiteSpeed and Performance in cPanel
If your hosting uses LiteSpeed Technologies' web server instead of Apache, you get a performance advantage out of the box. LiteSpeed handles high-traffic loads more efficiently and comes with its own caching system, LiteSpeed Cache, which integrates directly with WordPress.
Inside cPanel on a LiteSpeed-powered server, you may see the LiteSpeed Web Cache Manager tool. This lets you manage cache settings without leaving cPanel. For WordPress users, installing the free LiteSpeed Cache plugin from the WordPress plugin directory connects your site to this server-level cache automatically.
If your hosting plan includes LiteSpeed, it is worth taking advantage of; it can meaningfully reduce page load times without any complex configuration.
Common cPanel Mistakes Beginners Make
Most cPanel problems are caused by small mistakes, not major technical failures. Beginners usually click around confidently for five minutes and accidentally create three hours of troubleshooting.
Here are some of the most common mistakes to avoid:
Mistake | What Happens |
Editing files without backups | A small typo can break the entire website |
Uploading files outside public_html | Website files do not appear online |
Using weak passwords | Accounts become easier to hack |
Ignoring updates | Old plugins and themes create security risks |
Deleting unknown files | Important website functions may stop working |
Incorrect DNS changes | Emails or websites stop loading |
Installing too many plugins | WordPress becomes slow and unstable |
Forgetting SSL redirects | Visitors may still access the insecure HTTP version |
Leaving default usernames like “admin.” | Login pages become easier to target |
A good habit is to make one change at a time and test your website immediately after. That makes it much easier to identify what caused a problem if something breaks.
How to Keep Your cPanel Hosting Running Smoothly
Managing hosting becomes much easier when you follow a few basic habits consistently. You do not need advanced server knowledge for this part, just regular maintenance.
A few simple practices go a long way:
Keep WordPress, themes, and plugins updated
Delete unused plugins and themes
Run regular malware scans if your host provides them
Download backups before major updates
Use strong passwords for cPanel, email, and WordPress logins
Enable SSL on every domain and subdomain
Monitor storage space every few weeks
Use caching tools if your hosting supports LiteSpeed
Most website performance and security problems build slowly over time. A little maintenance every month prevents larger problems later.
Official cPanel Partner vs. Non-Official Provider - What is the Difference?
Not all cPanel hosting is the same. The software looks identical, but what happens behind it matters quite a bit. Here is a simple comparison:
Feature | Official cPanel Partner | Non-Official Provider |
Licensing | Licensed directly through cPanel, L.L.C. | May use shared, resold, or unlicensed installations |
Support | Access to cPanel's certified support infrastructure | Limited to the provider's own knowledge |
Updates | Receive official security patches and version updates promptly | May lag on updates, creating security gaps |
Staff Training | Certified partners must have employees who complete training through cPanel University and pass exams with a score of over 90% | No verified training requirement |
Priority Support | Certified partners receive Ultra Priority support tickets, the fastest response queue available | Standard commercial support only |
Verification | Status is publicly verifiable on the cPanel Partner Directory | No public verification available |
When you host with a non-official provider, you might get the cPanel interface, but you may not get the full security update cycle, and you have no way to verify whether the people supporting your account actually know what they are doing.
If you want hosting with a properly licensed cPanel environment, and if getting things managed so you do not have to deal with any of this yourself sounds appealing, we are an official cPanel partner. Our hosting plans come with a free SSL certificate, and for those who want a fully managed setup on VPS, we can handle the entire server environment for you. No need to dig into any of the sections above if you prefer not to. You can reach out for a free consultation, and we will sort out what fits your setup best.
Final Thoughts
cPanel is genuinely one of the best tools a website owner can have access to. It takes the complexity of server management and puts it behind a clean, organized dashboard. You do not need to know Linux commands, you do not need to hire a developer for basic tasks, and you do not need to panic every time something needs updating.
That said, knowing how to use it properly, setting up emails correctly, keeping backups, installing SSL, and understanding DNS make a difference in how smoothly your site runs and how quickly you can fix things when something goes wrong.
If you are just getting started, work through this guide section by section. Bookmark the parts that are relevant to where you are right now, and come back to the rest when you need them. cPanel hosting management is a skill that builds quickly with a little practice.
FAQs for How to Use cPanel to Manage Your Hosting
Q: Can I use cPanel on Windows hosting?
No. cPanel runs only on Linux-based servers. If your hosting is Windows-based, you will typically get Plesk instead. Most shared hosting plans use Linux, so cPanel is widely available, but always check before you sign up.
Q: What is the difference between cPanel and WHM?
cPanel is the control panel for managing a single hosting account, your files, emails, databases, and domains. WHM (Web Host Manager) sits one level above and is used by hosting providers or resellers to create and manage multiple cPanel accounts on a single server. As a regular website owner, you will only ever need cPanel.
Q: How do I change my PHP version in cPanel?
Go to Software → PHP Selector (or MultiPHP Manager, depending on your server setup). From there, you can switch your PHP version per domain. This matters if a plugin or script requires a specific PHP version. Most modern WordPress sites work best on PHP 8.1 or 8.2 as of 2025.
Q: Is cPanel free?
cPanel itself is not free; it is licensed software paid for by your hosting provider and included in your hosting plan. Some hosting companies charge extra for it. There are free alternatives like Webmin or ISPConfig, but none have the same feature depth or ecosystem support that cPanel has built up over decades.
Q: What does AutoSSL do, and do I need to touch it?
AutoSSL automatically installs and renews a free SSL certificate (via Let's Encrypt or Sectigo) on all domains in your cPanel account. You do not need to set it up or renew it manually; it runs on its own. You should check under Security → SSL/TLS Status to confirm it has run successfully on your domains.
Q: How do I add a cron job in cPanel?
Go to Advanced → Cron Jobs in your dashboard. A cron job lets you run a script or command automatically at set intervals, for example, running a WordPress backup script every night or refreshing a feed every hour. You set the schedule using cron syntax (minute, hour, day, month, day of week) and paste in the command you want to run.
Q: Can I host multiple websites under one cPanel account?
Yes, using addon domains. Each addon domain gets its own document root folder and behaves as a completely separate website. How many you can add depends on your hosting plan; entry-level plans may allow only one domain, while higher-tier plans allow unlimited addon domains.
Q: What is Softaculous Backup vs cPanel Backup?
Softaculous Backup covers only the applications installed through Softaculous, like your WordPress site. cPanel Backup covers your entire account, including all files, databases, email configurations, and settings. For full protection, use cPanel Backup. Softaculous Backup is useful as a quick per-site snapshot before a WordPress update.