Key Takeaways
- SSL/TLS encrypts all data between your server and visitors; no SSL means no HTTPS, and no HTTPS means browsers actively warn people away from your site
- Let's Encrypt gives you a free SSL certificate; Certbot automates the whole install process
- You need root or sudo access to your Linux VPS and a domain already pointed to your server's IP
- Apache and Nginx both have dedicated Certbot plugins that configure everything automatically
- Let's Encrypt certificates expire every 90 days; auto-renewal is not optional, it's essential
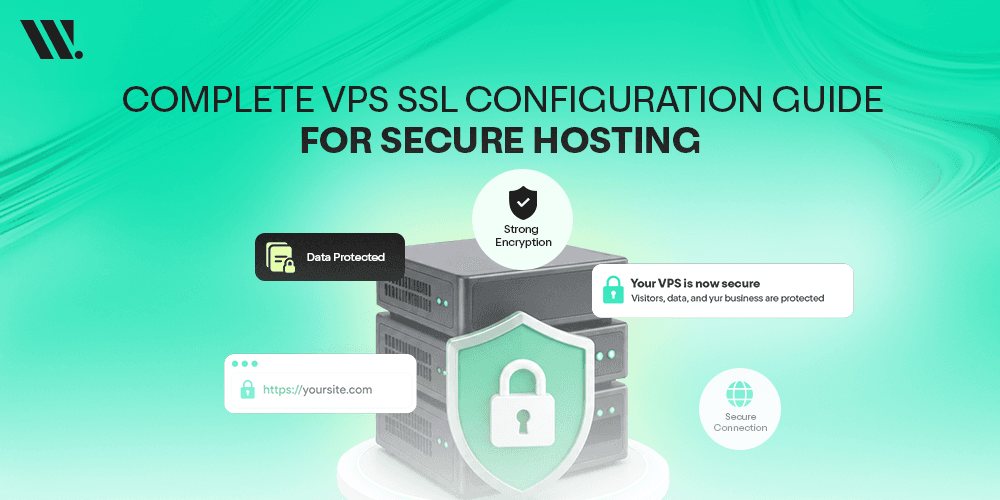
Why Your VPS Needs SSL (And It's Not Just About the Padlock)
You built or bought a VPS. You set up your site. Things are running. And then someone asks, "Wait, is this site secure?"
Good question. If your site is still running on just HTTP, you're sending data between your server and every visitor completely in the open. No encryption, no protection. Anyone on the same network can read it. And in 2025, browsers don't stay quiet about that. Chrome, Firefox, and Safari, they all flag HTTP sites as "Not Secure" right in the address bar. That's not a great first impression.
Here's what the numbers actually look like right now. According to Google's Transparency Report, over 99% of Chrome browsing time is spent on HTTPS pages across Windows, Mac, Android, and Linux. SSL Dragon reports that 92.6% of the top 100,000 websites now use HTTPS by default as of early 2026. And Let's Encrypt alone holds 63.7% of the SSL certificate authority market share, because free, automated certificates have completely changed the market.
So SSL isn't some advanced, optional extra. It's the baseline. The good thing is that on a Linux VPS, setting it up is very doable, even if you've never touched a certificate file in your life. In this guide, I’ll walk you through the whole process, step by step.
What SSL/TLS Actually Does
SSL (Secure Sockets Layer) and TLS (Transport Layer Security) are the protocols that make HTTPS work. TLS is technically the newer, more secure version, but most people still call it SSL, and that's fine. What matters is what it does.
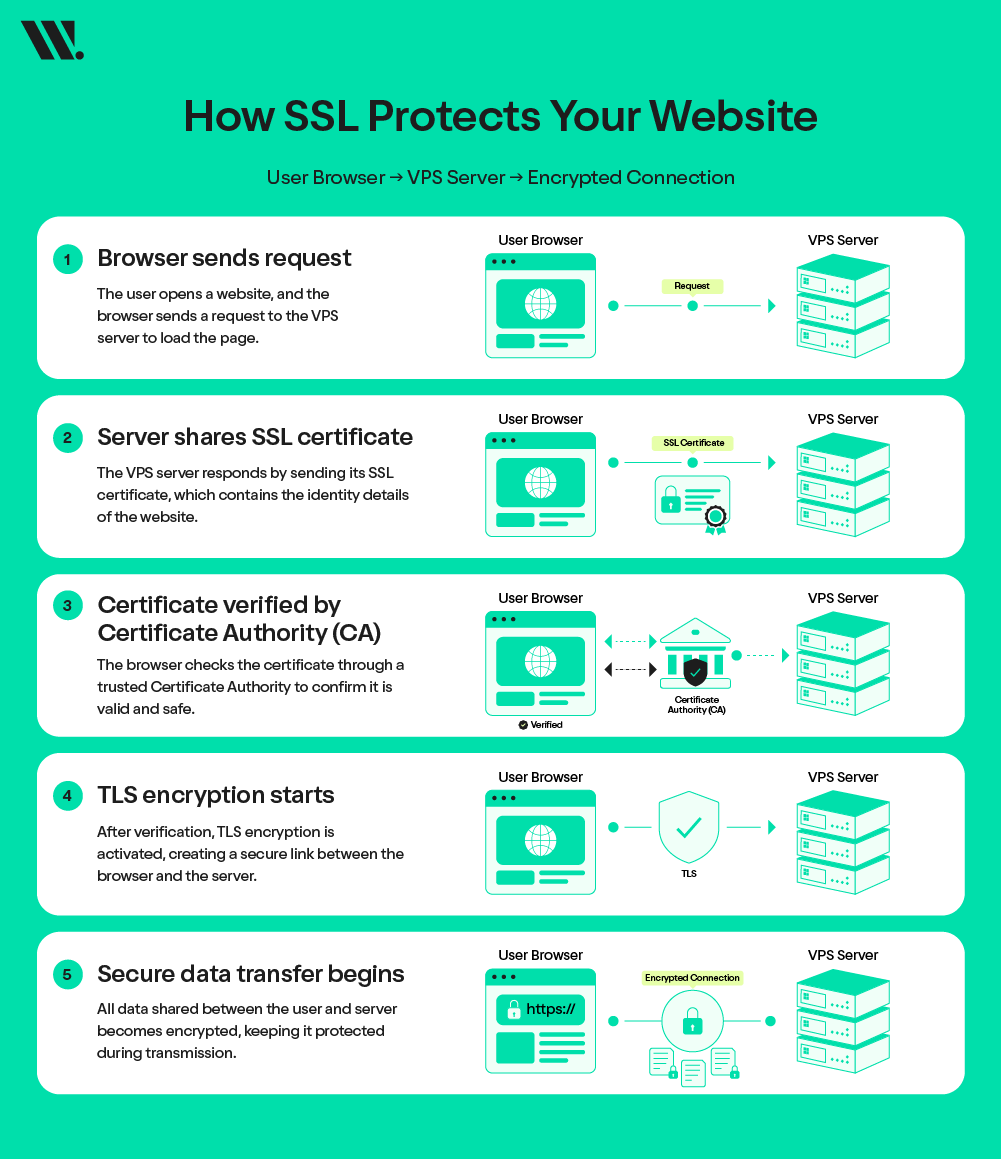
When someone visits your site over HTTPS, their browser and your server perform a quick handshake. During this, your SSL certificate is presented. The browser checks it against a trusted Certificate Authority (CA), a company or organization that has verified your certificate is legitimate. If everything checks out, an encrypted session starts. From that point on, all data between the visitor and your server is encrypted using TLS encryption, meaning even if someone intercepts it, they can't read it.
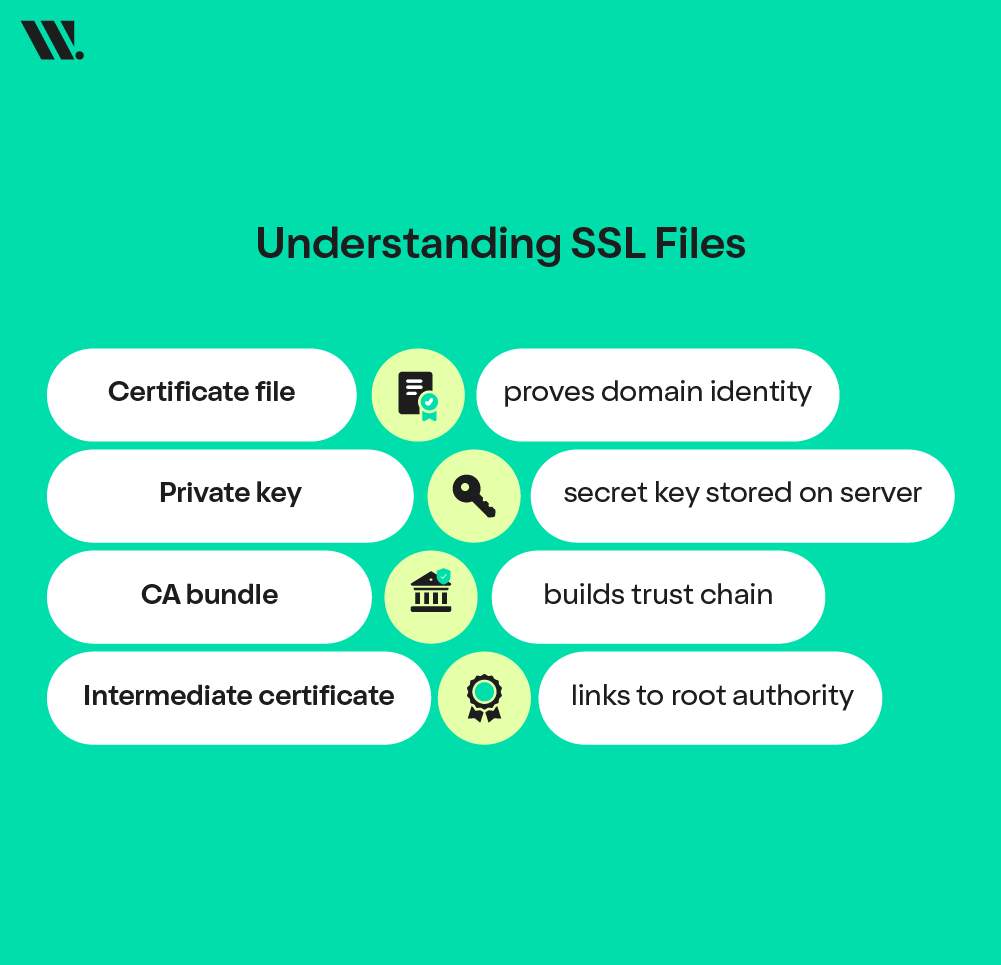
The certificate itself contains your public key, your domain name, and the CA's digital signature. Your server holds the matching private key, which never leaves the server. Together, these make secure communication possible. The certificate file, CA bundle, and intermediate certificate are the files you'll be working with when you configure SSL on your VPS.
Read more: The Pros and Cons of Different Types of SSL Certificates

What You Need Before Starting
Before running any command, make sure these are in place. Skipping this part is the number one reason SSL setup fails.
- A Virtual Private Server (Linux VPS or OVHcloud VPS) with root access or sudo privileges. You need to install software and edit configuration files. Shared hosting without SSH access won't work for this process.
- SSH access to your server. You'll run everything through the command line. If you haven't SSH'd into your server before, the basic command is SSH root@your_vps_ip (or ssh username@your_vps_ip if you're not using root).
- A domain name that's already pointed to your VPS. Your domain's DNS A record must point to your server's IP address, and DNS changes need time to propagate, sometimes a few hours. Don't skip this. Certbot verifies domain ownership by hitting your server over HTTP, so if DNS isn't pointing correctly, certificate issuance will fail.
- Apache or Nginx already installed and running on port 80. The site should load over HTTP before you add SSL. If it doesn't, sort that out first.
- Ports 80 and 443 are open in your firewall. Port 80 is used for HTTP and for the domain verification step. Port 443 is where HTTPS lives. Both need to be accessible.
Step-by-Step Instructions to Install SSL on Your VPS
Step 1 - Log In to Your VPS
Open your terminal and connect via SSH:
ssh root@your_vps_ip
If you're using a non-root user with sudo privileges:
ssh username@your_vps_ip
Once in, confirm you have the right permissions by running:
sudo whoami
It should return root. If it does, you're ready to move forward.
Step 2 - Install Certbot
Certbot is a free, open-source tool made by the Electronic Frontier Foundation (EFF). It's the official ACME client for Let's Encrypt, which means it handles the entire process of requesting, verifying, and installing your SSL certificate automatically. Consider it as the middleman between your server and the Certificate Authority.
The recommended installation method in 2025 is via Snap, which gives you the latest version and handles updates automatically.
For Ubuntu/Debian:
sudo apt update
sudo apt install snapd -y
sudo snap install core; sudo snap refresh core
sudo snap install --classic certbot
sudo ln -s /snap/bin/certbot /usr/bin/certbot
For CentOS/RHEL:
sudo dnf install epel-release -y
sudo dnf install snapd -y
sudo systemctl enable --now snapd.socket
sudo snap install --classic certbot
sudo ln -s /snap/bin/certbot /usr/bin/certbot
Once installed, check the version to confirm it worked:
certbot --version
You should see a version number. If you do, Certbot is ready.
Note: Some VPS environments (like certain cloud-optimized Ubuntu builds) may have compatibility issues with Snap. If that happens, you can install via pip as an alternative: sudo apt install python3-certbot-nginx or sudo apt install python3-certbot-apache directly from your package manager.
Step 3 - Generate Your SSL Certificate
This is where the actual SSL certificate gets created and tied to your domain. Certbot has two main ways to do this: automatic (recommended) and manual (for edge cases).
The Automatic Way: Use the Web Server Plugin
If you're running Nginx:
sudo certbot --nginx -d yourdomain.com -d www.yourdomain.com
If you're running Apache:
sudo certbot --apache -d yourdomain.com -d www.yourdomain.com
Certbot will ask for your email address (for renewal reminders), ask you to agree to Let's Encrypt's terms, and then handle everything else, including modifying your web server configuration and setting up the HTTP to HTTPS redirect. For most people, this is all they need.
The Manual Way: Standalone Mode
If, for some reason, you need to get the certificate without touching your web server config, use:
sudo certbot certonly --standalone -d yourdomain.com
Note that this temporarily uses port 80, so you'll need to stop your web server first:
sudo systemctl stop nginx # or apache2
sudo certbot certonly --standalone -d yourdomain.com
sudo systemctl start nginx
Where Your Certificate Files End Up
After a successful run, your files are stored at:
/etc/letsencrypt/live/yourdomain.com/
├── fullchain.pem → Your certificate + intermediate certificate (use this for most servers)
├── privkey.pem → Your private key (keep this secure, never share it)
├── cert.pem → Just your domain certificate
└── chain.pem → The CA bundle / intermediate certificate
The fullchain.pem and privkey.pem are the two files you'll reference in your web server configuration.
Step 4: Configure Your Web Server
If you used the --nginx or --apache plugin in Step 3, Certbot has already done this for you. You can skip to Step 5. But if you used standalone mode, or if you want to understand what's happening under the hood (which I recommend), here's what the configuration looks like.
Nginx Configuration
Your virtual host configuration for SSL on Nginx goes in /etc/nginx/sites-available/yourdomain.com. Here's an easy yet practical baseline:
server {
listen 80;
server_name yourdomain.com www.yourdomain.com;
return 301 https://$host$request_uri;
}
server {
listen 443 ssl;
server_name yourdomain.com www.yourdomain.com;
ssl_certificate /etc/letsencrypt/live/yourdomain.com/fullchain.pem;
ssl_certificate_key /etc/letsencrypt/live/yourdomain.com/privkey.pem;
ssl_protocols TLSv1.2 TLSv1.3;
ssl_ciphers HIGH:!aNULL:!MD5;
ssl_prefer_server_ciphers on;
root /var/www/yourdomain.com;
index index.html index.php;
}
The first server block forces all HTTP traffic on port 80 to redirect to HTTPS. The second block handles the actual HTTPS traffic on port 443.
Test your configuration before restarting:
sudo nginx -t
sudo systemctl reload nginx
Apache Configuration
For Apache, first enable the SSL module and the headers module:
sudo a2enmod ssl
sudo a2enmod headers
sudo systemctl restart apache2
Then create or edit your virtual host configuration. You'll typically have two blocks, one for port 80 and one for port 443:
<VirtualHost *:80>
ServerName yourdomain.com
ServerAlias www.yourdomain.com
Redirect permanent / https://yourdomain.com/
</VirtualHost>
<VirtualHost *:443>
ServerName yourdomain.com
ServerAlias www.yourdomain.com
DocumentRoot /var/www/yourdomain.com
SSLEngine on
SSLCertificateFile /etc/letsencrypt/live/yourdomain.com/fullchain.pem
SSLCertificateKeyFile /etc/letsencrypt/live/yourdomain.com/privkey.pem
SSLProtocol all -SSLv3 -TLSv1 -TLSv1.1
SSLCipherSuite HIGH:!aNULL:!MD5
SSLHonorCipherOrder on
</VirtualHost>
Test and restart:
sudo apache2ctl configtest
sudo systemctl reload apache2
Step 5: Set Up Auto-Renewal
Let's Encrypt certificates are valid for 90 days. That's by design; shorter lifespans mean faster rotation and less exposure if a certificate is ever compromised. But 90 days is short enough that manual renewal is a nightmare. Auto-renewal is the solution.
When you install Certbot via Snap, it automatically creates a systemd timer that runs twice a day and renews any certificate that's within 30 days of expiry. You don't need to do anything to enable it, but you should verify it's working.
Run a dry-run test:
sudo certbot renew --dry-run
If it completes without errors, your renewal is set up correctly. To confirm the timer is active:
sudo systemctl status certbot.timer
You should see it listed as active. If you're not using systemd (older systems may use cron instead), check for a cron job:
sudo crontab -l
Look for a line containing certbot renew. If it's there, you're covered.
One extra step worth doing: add a post-renewal hook so your web server reloads automatically after each renewal. Create a file at /etc/letsencrypt/renewal-hooks/post/reload-webserver.sh:
#!/bin/bash
systemctl reload nginx # change to apache2 if using Apache
Make it executable:
sudo chmod +x /etc/letsencrypt/renewal-hooks/post/reload-webserver.sh
This way, every time your certificate renews, your server picks up the new files without you touching anything.
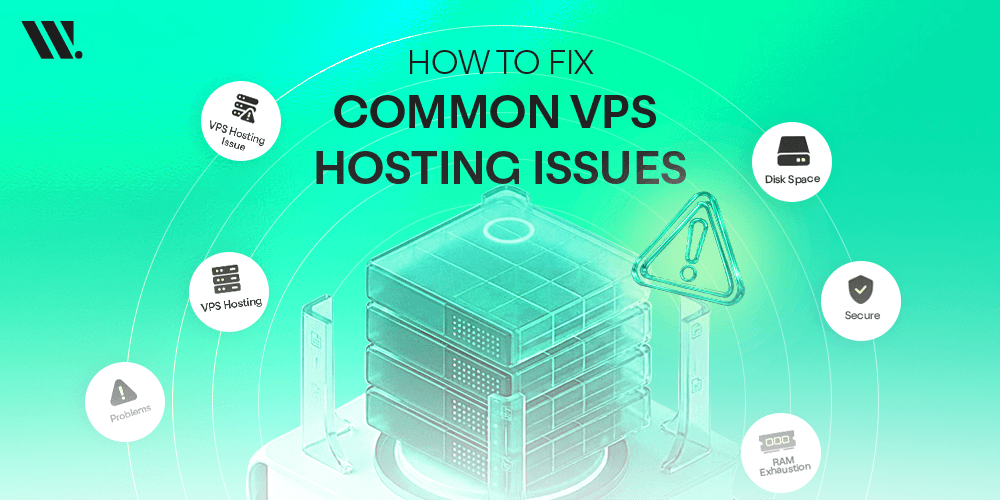
Troubleshooting Common Issues on VPS
Even with the best setup, things sometimes go sideways. Most problems are easy to fix once you know what is causing them. These issues usually come from DNS delays, wrong certificate setup, or server-level blocks. Below are the most common ones you may face during SSL setup on VPS, and how to handle them without stress.
| Issue | What Happens | Fix | Useful Tool |
|---|---|---|---|
| Mixed Content Warning | Some files load over HTTP on an HTTPS page | Update all links to HTTPS or use relative URLs | Why No Padlock |
| DNS Not Propagated | Domain not verified by Certificate Authority (CA) | Wait for the DNS update and confirm records | WhatsMyDNS |
| Port 80 Blocked | Certbot cannot verify the domain over HTTP | Open ports using firewall rules on your VPS server | UFW |
| Invalid Certificate Chain | Missing intermediate certificate or CA bundle | Install the full certificate bundle correctly | OpenSSL |
| Domain Mismatch | SSL does not match your domain name | Reissue the certificate with the correct domain or wildcard | Let's Encrypt |
| System Time Issue | SSL fails due to the wrong server time | Sync time using NTP on your Linux VPS | timedatectl |
| Port 443 Blocked | HTTPS not accessible | Allow inbound HTTPS traffic on the firewall | iptables |
| SSL Not Trusted | The browser shows a warning despite installation | Check the certificate file, public key, and chain | Qualys |
These tools help you test, monitor, and debug your VPS HTTPS configuration in real time. If something breaks, do not rush to reinstall everything. Check logs, verify your SSL configuration file, and test step by step.
Final Thoughts
VPS HTTPS configuration isn't something you do once and forget. Certificates expire. Server configs change. New TLS vulnerabilities get discovered. Keep an eye on your renewal logs (at /var/log/letsencrypt/letsencrypt.log), check your SSL Labs grade every few months, and make sure you're running TLS 1.2 and TLS 1.3, not older versions.
If any of this still feels like a lot, that's completely fine. Not everyone wants to manage server configurations, and honestly, not everyone should have to. At Websouls, we offer managed VPS hosting where the SSL setup, configuration, renewal, and ongoing server management are all handled for you.
We also offer a free consultation if you just want to talk through your setup, ask questions, or figure out whether managed hosting is a better fit for what you're building. No pressure, just someone who knows this stuff and is happy to help you sort it out.
FAQs for VPS SSL Configuration
1. Can I install SSL on a VPS without a domain name?
No, a domain is required for most SSL certificates. The Certificate Authority (CA) needs to verify domain ownership before issuing a certificate. Without a domain, the HTTPS setup will not work properly.
2. Does SSL affect VPS performance?
Yes, but the impact is very small. Modern TLS encryption is optimized, and most VPS servers handle it easily. In many cases, HTTPS with HTTP/2 can even improve loading speed.
3. Can I use one SSL certificate for multiple domains?
Yes, you can use SAN (multi-domain) or wildcard certificates. These allow one SSL certificate to secure multiple subdomains under a single setup.
4. What happens if my SSL certificate expires?
Your website will show security warnings in browsers, and users may not trust your site. This is why auto-renewal is important in any VPS SSL configuration.
5. Is a free SSL certificate enough for business websites?
For most websites, yes. Free certificates from Let's Encrypt provide strong data encryption and are trusted by browsers. Paid SSL is only needed for advanced validation or branding.
6. How do I check if my VPS SSL setup is working correctly?
You can test your setup using SSL testing tools. These tools check your certificate file, CA bundle, and full HTTPS setup for errors.
7. Can I move my SSL certificate to another VPS server?
Yes, but you must move the private key, certificate files, and configuration correctly. After moving, update your SSL configuration file on the new server.
8. Do I need a different SSL setup for Apache and Nginx?
Yes, both have different virtual host configuration styles. The core idea is the same, but file paths and commands are different.
.png&w=1920&q=75)